

Welcome to the D-Lay Cable knowledge center! As a leading manufacturer and supplier of high-performance network cabling solutions, we believe in empowering our partners and customers with the skills they need to succeed. While pre-terminated patch cables are perfect for many applications, knowing how to create custom-length Ethernet cables is an invaluable skill for network professionals, installers, and DIY enthusiasts.
Creating your own cables ensures a perfect fit for every installation, reduces cable clutter, and can be more cost-effective for large projects. dlaycable will walk you through the process for both Cat5e and Cat6 cables, using the industry-standard T568B wiring scheme.
Article Contents
1. Essential Tools & Materials You’ll Need
Before you begin, gathering the right high-quality tools and materials is crucial for creating a reliable, high-performance cable. At D-Lay Cable, we provide everything you need, all tested for quality and durability.
- Bulk Ethernet Cable: Choose high-quality Cat5e or Cat6 cable. Cat6 has a thicker gauge and often includes a plastic spline to reduce crosstalk, making it ideal for higher speeds and future-proofing your network.
- RJ45 Connectors: Ensure you have the correct RJ45 connectors for your cable type (Cat5e or Cat6). Cat6 connectors are designed to accommodate the thicker wires.
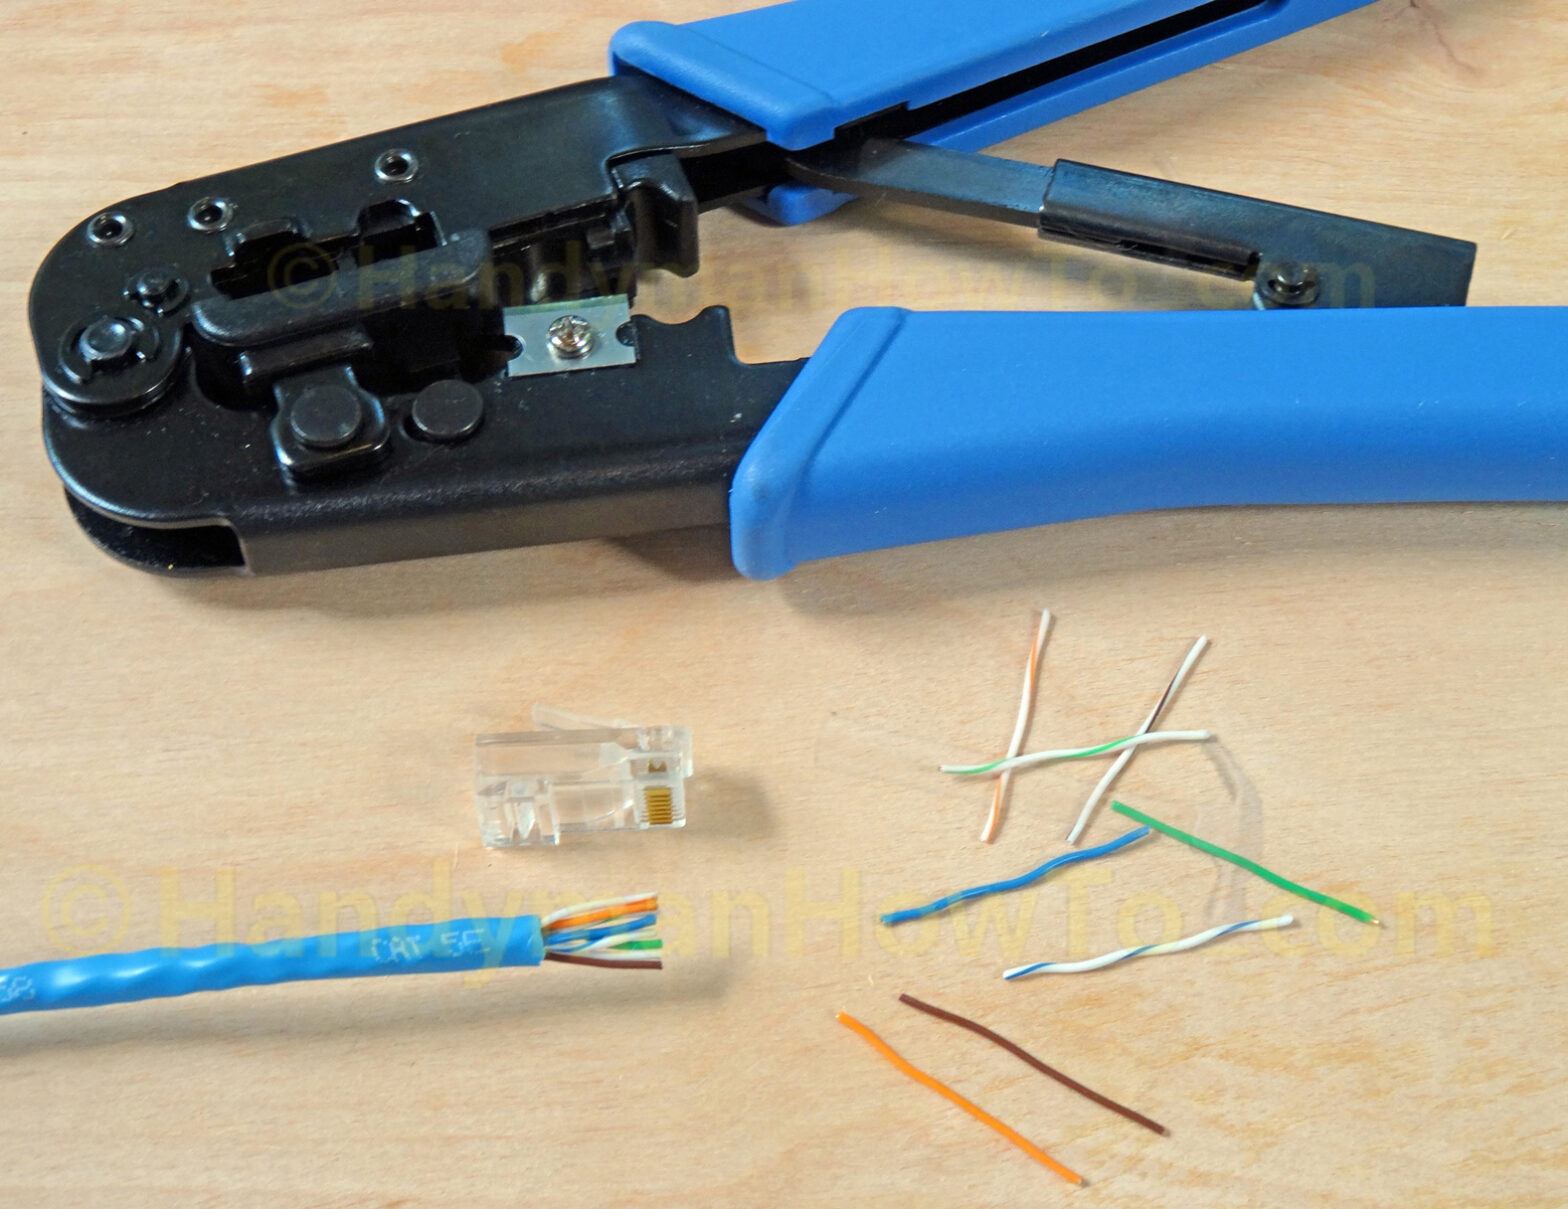
- Crimping Tool: A reliable crimping tool is non-negotiable. It securely fastens the RJ45 connector to the cable and pushes the pins into the wires.
- Cable Stripper/Cutter: While many crimping tools have a built-in stripper, a dedicated tool can offer more precision without nicking the inner wires.
- Network Cable Tester: This is a vital tool to verify that your cable is wired correctly and functioning perfectly. A simple mistake can be nearly impossible to diagnose without a tester.
- (Optional) RJ45 Boots/Strain Reliefs: These rubber or plastic boots slide over the connector to provide extra strain relief and a professional finish.
2. Understanding Wiring Standards: T568A vs. T568B
There are two recognized standards for wiring Ethernet cables: T568A and T568B. They define the specific order of the eight colored wires within the connector. While functionally similar, T568B is the most widely used standard in the United States and for new commercial network installations.
For a standard “straight-through” cable (used to connect a computer to a switch, router, or wall plate), you must use the same wiring standard on both ends. To ensure consistency and compatibility, we strongly recommend using the T568B standard.
T568B Wiring Pinout (The one you should use!)
Holding the RJ45 connector with the locking tab facing down and the copper pins facing you, the wire order from left to right (Pin 1 to Pin 8) is:
- White/Orange
- Orange
- White/Green
- Blue
- White/Blue
- Green
- White/Brown
- Brown
3. The Step-by-Step Guide to Making Your Ethernet Cable
With your tools ready and your workspace clear, you can begin. Follow these steps carefully for a perfect result every time.
Step 1: Cut and Strip the Cable Jacket
Measure your desired cable length and cut it cleanly. Using your cable stripper, insert the cable and score the outer jacket about 1 inch (2.5 cm) from the end. Rotate the tool or the cable, then pull the jacket off. Be very careful not to nick the twisted pairs inside.
Step 2: Expose, Separate, and Untwist the Wires
You will see four twisted pairs of wires. If you are using Cat6 cable, you will also see a plastic spline in the middle—cut this spline off flush with the cable jacket. Carefully untwist each pair and straighten them out as much as possible. This step requires patience for a good result.
Step 3: Arrange the Wires in the T568B Order
This is the most critical step. Align the eight straightened wires side-by-side in the T568B color order mentioned above.
(White/Orange, Orange, White/Green, Blue, White/Blue, Green, White/Brown, Brown)
Keep them flat and tightly together between your thumb and forefinger.
Step 4: Trim the Wires to a Uniform Length
Holding the wires firmly in order, use the cutter on your crimping tool to trim them to a uniform length of about 1/2 inch (1.25 cm) from the edge of the cable jacket. A clean, straight cut is essential for all wires to make proper contact inside the connector.
Step 5: Insert Wires into the RJ45 Connector
Hold the RJ45 connector with the tab facing down. Carefully and slowly slide the aligned wires into the connector, ensuring they maintain their order. Push them until all wire ends are fully seated at the front of the connector. You should be able to see the shiny copper ends of the wires through the transparent tip of the connector. Also, ensure the cable’s outer jacket is pushed inside the connector by at least 1/4 inch to be properly secured by the crimp.
Step 6: Crimp the Connector
Insert the RJ45 connector into the appropriate slot on your crimping tool. Squeeze the handles firmly and decisively until you hear a “click” or feel the mechanism bottom out. This action does two things: it pushes the copper pins down to pierce the wire insulation and make contact, and it secures the cable jacket to the connector for strain relief.
Step 7: Repeat for the Other End
Now, simply repeat steps 1-6 on the other end of the cable, ensuring you use the same T568B wiring standard for a straight-through cable.
4. The Final Check: Testing Your New Cable
Never assume a cable works. Plug both ends of your newly created cable into your network cable tester. A good tester will have a main unit and a remote unit. Turn it on. The tester will send signals down each of the 8 wires. You should see a sequence of lights from 1 through 8 illuminate in order on both units. If they do, congratulations! You’ve made a successful Ethernet cable.
5. Common Mistakes and How to Avoid Them
- Incorrect Wire Order: The most common failure. If your tester shows a “miswire” or lights up out of sequence, you have a wire in the wrong place. Cut the end off and start again, paying close attention to the T568B color code.
- Wires Not Fully Seated: If a light on the tester doesn’t illuminate at all, it means a wire isn’t making contact. This is usually because it wasn’t pushed all the way into the connector before crimping.
- Jacket Not Secured: If the outer jacket isn’t crimped securely inside the connector, the cable will be prone to failure from pulling and flexing. Always ensure the jacket is inserted far enough into the connector body.
6. D-Lay Cable: Your Partner in Network Excellence
Mastering the art of cable creation gives you ultimate control over your network infrastructure. It’s a skill built on precision, practice, and—most importantly—high-quality components.
At D-Lay Cable, we are more than just a supplier; we are your partner. We provide the professional-grade, Fluke-tested bulk cables, precision connectors, and reliable tools you need to build networks that perform today and in the future. Our commitment to quality, backed by UL, CE, and RoHS certifications, ensures every connection you make is a solid one.
Ready to build a better network? Explore our complete range of bulk network cables and cabling accessories today, or contact our expert team for custom OEM/ODM solutions.