

In modern networking, the strength of your connection is often determined by its weakest link. You can invest in the best routers, switches, and high-performance bulk Cat6 cable, but a poorly terminated Ethernet cable can undermine the entire system. At D-Lay Cable, we don’t just supply professional-grade networking components; we empower you with the knowledge to use them correctly. A perfect crimp is the cornerstone of a reliable, high-speed network.
This comprehensive guide will walk you through every step of crimping a Cat6 cable. We’ll cover the tools, the industry standards, and the precise techniques needed to create a flawless connection that ensures maximum performance and signal integrity.
Why a Perfect Crimp is Non-Negotiable
Before we touch a single tool, it’s crucial to understand why this skill is so important. A properly crimped Cat6 cable ensures:
- Optimal Data Speeds: Cat6 is designed for speeds up to 10 Gbps over shorter distances. A bad crimp introduces “crosstalk” and “return loss,” significantly degrading speed and performance.
- Reliable PoE Delivery: For devices like IP cameras, VoIP phones, and wireless access points, Power over Ethernet (PoE) is essential. A solid connection ensures consistent and safe power delivery.
- Network Stability: Loose connections or incorrect wiring are leading causes of intermittent network drops and frustrating troubleshooting sessions. Doing it right the first time saves hours of work later.
In short, a professional crimp is your guarantee that the high-quality cable you’ve chosen will perform to its certified specifications.
Essential Tools and Materials
Gathering the right equipment is the first step to success. For a professional result, we recommend the following:
- High-Quality Cat6 Cable: The foundation of your connection. Using a reliable, standards-compliant cable, like those from D-Lay Cable, is critical. Be aware if your cable has a central spline (a plastic divider), as this is common in Cat6 to reduce crosstalk.
- Cat6 RJ45 Connectors: These are not the same as Cat5e connectors. Cat6 plugs often have staggered, offset pin layouts and guide bars (or “load bars”) to accommodate the thicker 23 AWG wires and ensure proper alignment.
- Ratcheting Crimping Tool: A quality crimper ensures a uniform, complete press every time. Look for a tool that can handle Cat6 connectors and includes a built-in cable cutter and stripper.
- Cable Stripper or Flush Cutters: While many crimpers have a stripper, a dedicated tool can offer more precision. Flush cutters are essential for getting a clean, straight cut across the eight wires.
- Network Cable Tester: This is a non-negotiable final step. A tester verifies that every pin is correctly wired and making a solid connection. A simple continuity tester is good; a more advanced one can check for shorts, split pairs, and other faults.
Understanding Wiring Standards: T568A vs. T568B
There are two recognized standards for wiring an Ethernet cable: T568A and T568B. While functionally identical when used consistently, T568B is the dominant standard in the United States and most new commercial installations.
For a standard “straight-through” cable (used to connect a computer to a switch, router, or wall plate), you must use the same standard on both ends. Consistency is key.
Here is the color code for each, viewed with the RJ45 connector tab facing down and the copper pins facing you:
T568B (The Recommended Standard)
From left to right (Pin 1 to Pin 8):
- Orange/White
- Orange
- Green/White
- Blue
- Blue/White
- Green
- Brown/White
- Brown
T568A
From left to right (Pin 1 to Pin 8):
- Green/White
- Green
- Orange/White
- Blue
- Blue/White
- Orange
- Brown/White
- Brown
Pro Tip: Unless you have a specific reason to use T568A (like matching an existing installation), always default to T568B.
The Step-by-Step Crimping Process
With your tools ready and standard chosen, it’s time to create the perfect connection. Follow these steps meticulously.
Step 1: Strip the Outer Jacket
Carefully use your cable stripper to score and remove about 1 to 1.5 inches (2.5 to 4 cm) of the outer cable jacket. Be cautious not to nick the inner twisted pairs. A clean cut here is vital. If your Cat6 cable has a rip cord, you can use that to help open the jacket.
Step 2: Prepare the Wires
Once the jacket is removed, you will see four twisted pairs of wires and, likely, a plastic spline. Cut the spline as close to the jacket as possible. Then, untwist each pair completely, separating all eight wires. Try to straighten them out as much as you can with your fingers; this will make alignment much easier.
Step 3: Arrange, Flatten, and Trim
Arrange the eight wires in the correct order according to the T568B standard. This is the most critical step for a functional cable. Once ordered, flatten them out and pinch them tightly together so they are parallel and in a flat ribbon.
T568B Order Reminder: Orange/White, Orange, Green/White, Blue, Blue/White, Green, Brown/White, Brown.
Using your flush cutters, make a single, clean cut across the tips of the wires, leaving about 0.5 inches (1.25 cm) of wire exposed from the jacket. The cut must be perfectly straight.
Step 4: Insert Wires into the RJ45 Connector
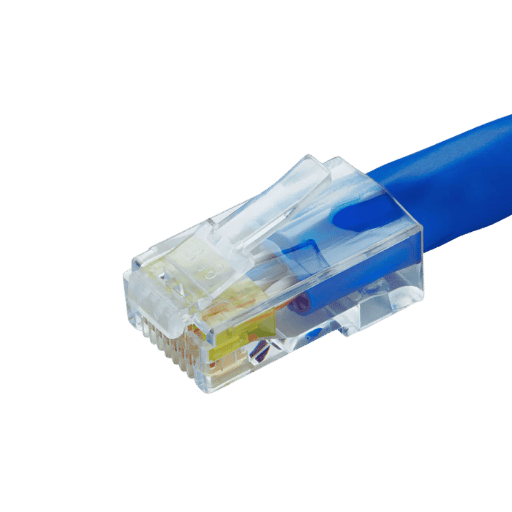
Hold the RJ45 connector with the tab down and pins facing away from you. Carefully and slowly slide the flat ribbon of wires into the connector. Ensure each wire slides into its own dedicated channel all the way to the end of the connector. You should be able to see the copper tips of the wires through the clear plastic nose of the plug.
Crucially, the cable’s outer jacket must also slide into the back of the connector by about a quarter-inch. This is what the crimper uses to secure the cable and provide strain relief.
Step 5: Crimp the Connector
Insert the wired RJ45 connector into the appropriate slot on your crimping tool. Squeeze the handles firmly and completely. A good ratcheting tool will click and only release once a full crimp cycle is complete. This action does two things simultaneously:
- It pushes the copper pins down to pierce the wire insulation and make contact with the copper conductor.
- It secures the cable jacket to the plug for strain relief.
Step 6: Repeat and Test
Repeat the exact same process on the other end of the cable, using the same T568B standard. Once both ends are crimped, plug the cable into your network tester. A “Pass” light with all 8 pins lit correctly confirms a successful termination. If you get a “Fail” or a miswire error, the most likely culprit is an incorrectly ordered wire. Cut the end off and try again.
Common Crimping Mistakes and How to Avoid Them
- Wrong Wire Order: The #1 cause of failure. Double and triple-check the T568B color code before inserting and crimping.
- Jacket Not Secured: If the outer jacket is not pushed far enough into the plug, the strain relief clamp will not grab it. This leads to a weak connection that will fail over time.
- Wires Not Fully Seated: If the wires don’t reach the very end of the connector, the pins won’t make proper contact. You must see the shiny copper ends through the front of the plug.
- Nicked Inner Wires: Being too aggressive when stripping the outer jacket can damage the insulation of the inner wires, leading to shorts and performance issues.
Conclusion: Building Networks That Last
Crimping a Cat6 cable is a skill that blends precision with practice. By understanding the reasons behind each step and using high-quality components, you can create robust, reliable network cables that perform to their maximum potential. This attention to detail is what separates an amateur setup from a professional installation.
At D-Lay Cable, we are committed to providing the professional-grade cables, connectors, and tools you need to build with confidence. A network is only as strong as its connections, and now you have the knowledge to make them perfectly, every time.