

Crimping a Cat6 Ethernet cable is a straightforward process that involves stripping the outer jacket, arranging the eight internal wires according to the T568B color code standard, carefully inserting them into a Cat6 RJ45 connector, and using a dedicated crimping tool to securely fasten the connector to the cable. This skill empowers you to create custom-length network cables, repair damaged ends, and save money, making it an invaluable asset for any home networking enthusiast or IT professional. By mastering this technique, you gain complete control over your wired network infrastructure, ensuring reliable, high-speed connections tailored precisely to your needs.
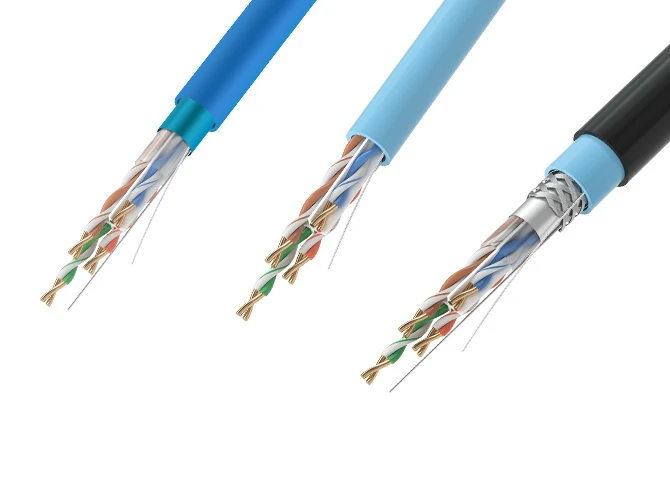
Table of Contents
- Before You Begin: What Tools and Materials Do You Need?
- Understanding the Blueprint: T568A vs. T568B Wiring Standards
- The Step-by-Step Guide to Crimping a Cat6 Cable (T568B)
- The Final Check: How to Test Your New Ethernet Cable
- Pro Tips and Common Mistakes to Avoid
- Frequently Asked Questions (FAQ) about Crimping Cat6
Before You Begin: What Tools and Materials Do You Need?
Before you can terminate your first network cable, you need to gather the correct equipment. Using the right tools not only makes the job easier but also ensures a durable and reliable connection that performs to Cat6 standards. Investing in a quality kit from the start will pay dividends in frustration-free crimping for years to come.
Essential Tools for the Job
While you might be tempted to use makeshift tools, we strongly advise against it. A proper set of networking tools is designed for precision and will prevent damage to the delicate internal wires or the connector. Here is a breakdown of what you’ll absolutely need.
| Tool | Purpose and Importance |
|---|---|
| Crimping Tool | This is the most critical tool. A good crimper designed for RJ45 connectors will evenly press the copper contacts through the wire insulation and secure the cable strain relief lock. Many models include a built-in wire cutter and jacket stripper. |
| Wire Stripper / Cable Stripper | Specifically designed to score and remove the outer PVC jacket of the Ethernet cable without nicking the twisted pairs inside. While some crimpers have this built-in, a dedicated stripper often provides more control. |
| Wire Cutters / Snips | Used for making a clean, flush cut of the eight arranged wires before inserting them into the connector. Scissors or a utility knife can work in a pinch, but dedicated snips are far more precise. |
| Ethernet Cable Tester | Highly recommended. A tester will quickly verify that all eight wires are correctly ordered and making a good connection. It saves immense time troubleshooting a faulty cable later. |
Choosing the Right Cable and Connectors
Not all Ethernet components are created equal. To achieve true Cat6 performance, you must use components specifically rated for it. Mixing and matching with lower-category parts will bottleneck your network speed.
For the cable itself, you’ll be using a bulk roll of Category 6 (Cat6) Unshielded Twisted Pair (UTP) cable. Cat6 cable features thicker 23 AWG copper conductors, tighter twists, and often a plastic spline that runs down the center to separate the pairs and reduce crosstalk. For the connectors, you must use Cat6-rated RJ45 connectors. These have staggered pin layouts to accommodate the thicker wires and maintain the proper separation required for higher frequencies. Using Cat5e connectors on a Cat6 cable will result in a poor fit and degraded performance.
Understanding the Blueprint: T568A vs. T568B Wiring Standards
Before a single wire is arranged, it’s crucial to understand the wiring standards. The TIA/EIA-568 standard defines two color code schemes for terminating twisted-pair network cables: T568A and T568B. While they are functionally similar, the industry has largely adopted one as the de facto standard for new installations.
What is the T568B Standard? (The Modern Choice)
T568B is the most common wiring standard used today for new network installations in North America and around the world. When creating a standard “straight-through” cable for connecting a computer to a router, switch, or wall plate, you will wire both ends of the cable using the T568B standard. Its prevalence makes it the go-to choice to ensure consistency and avoid confusion.
Why Does T568A Exist?
The T568A standard is the older of the two and is specified for U.S. government contracts. It is also backward compatible with older USOC wiring schemes. While less common for new commercial or residential projects, you may encounter it in older buildings. The key takeaway is consistency: if you are adding to or repairing an existing network, always check the existing terminations and match the standard you find.
Straight-Through vs. Crossover: Which One Do You Need?
The choice of standard directly impacts the type of cable you create.
- A Straight-Through Cable has the same standard on both ends (e.g., T568B on End 1 and T568B on End 2). This is what you’ll make 99% of the time. It’s used to connect different types of devices, like a PC to a switch.
- A Crossover Cable has different standards on each end (T568A on End 1 and T568B on End 2). Historically, this was used to connect two similar devices directly, like two PCs or two switches. However, modern network devices feature Auto-MDI/X, which automatically detects the cable type and adjusts, making crossover cables largely obsolete for modern hardware.
For this guide, we will be creating a standard straight-through cable using the T568B standard.
| Pin Number | T568B Standard (Most Common) | T568A Standard |
|---|---|---|
| 1 | White/Orange | White/Green |
| 2 | Orange | Green |
| 3 | White/Green | White/Orange |
| 4 | Blue | Blue |
| 5 | White/Blue | White/Blue |
| 6 | Green | Orange |
| 7 | White/Brown | White/Brown |
| 8 | Brown | Brown |
The Step-by-Step Guide to Crimping a Cat6 Cable (T568B)
With your tools gathered and a clear understanding of the wiring diagram, it’s time to begin the crimping process. Work carefully and methodically. A little patience here will ensure a perfect connection on your first try.
Step 1: Measure and Cut the Cable
Determine the length of cable you need, adding a little extra slack to be safe. Use the cutting blade on your crimping tool or your wire cutters to make a clean, flat cut at the end of the cable.
Step 2: Carefully Strip the Outer Jacket
Using your cable stripper, gently score the outer PVC jacket about 1 to 1.5 inches (2.5 – 4 cm) from the end. The goal is to cut through the jacket without cutting or nicking the insulation of the twisted pairs inside. Rotate the tool or cable once, then pull the severed piece of the jacket off. If your Cat6 cable has a rip cord (a thin nylon string), you can use it to help strip the jacket as well.
Step 3: Prepare and Untwist the Wires
After removing the jacket, you will see four twisted pairs of wires and, likely, a plastic spine (also called a cross-web separator). Trim this plastic spine as close to the jacket as possible. Next, carefully untwist each of the four pairs. Try to keep the twists intact as close to the jacket as you can, as these twists are essential for preventing signal interference (crosstalk). Straighten each of the eight individual wires out as much as possible with your fingers.
Step 4: Arrange the Wires in T568B Order
This is the most critical step. Holding the wires flat and parallel between your thumb and forefinger, arrange them from left to right according to the T568B color code:
White/Orange, Orange, White/Green, Blue, White/Blue, Green, White/Brown, Brown.
Double-check and triple-check this order. A common mnemonic to help remember the pattern is to think of the solid colors in the order they appear in a rainbow (Orange, Green, Blue, Brown), with Blue being in the middle. The striped wire always precedes its solid-colored partner, with the Green pair being “split” around the Blue pair.
Step 5: Trim and Insert into the RJ45 Connector
Once the wires are in the correct order, pinch them tightly together to keep them flat and aligned. Bring your wire cutters or the blade on your crimper in and make a single, clean cut, leaving about 1/2 inch (1.25 cm) of wire exposed from the end of the jacket. The wires must be perfectly even.
Now, pick up your Cat6 RJ45 connector with the locking tab facing down. Carefully and slowly slide the arranged wires into the connector. Each wire should slide into its own dedicated channel. Push firmly until all wires have reached the very end of the connector. You should be able to see the copper ends of the wires through the clear tip of the connector. Crucially, the cable jacket itself should be pushed inside the connector, past the strain relief bar, to ensure a secure crimp.
Step 6: Crimp the Connector Firmly
Visually inspect the wire order one last time through the end of the connector. If everything looks correct, insert the RJ45 connector into the corresponding slot on your crimping tool. Squeeze the handles of the tool firmly and completely. You should hear a “click” as the tool pushes the gold pins down to pierce the wire insulation and secures the strain relief clamp onto the cable jacket. Release the handles and remove the perfectly terminated cable.
Step 7: Repeat and Complete the Cable
Now, simply repeat steps 1 through 6 on the other end of the cable, ensuring you use the same T568B standard for a straight-through cable.
The Final Check: How to Test Your New Ethernet Cable
Never assume a cable works perfectly without testing it. A simple network cable tester is an inexpensive and invaluable tool. Testers typically have a main unit and a remote unit. Plug one end of your newly crimped cable into the main unit and the other end into the remote unit. Turn it on. The tester will send a signal down each of the eight wires. It should light up a series of LEDs from 1 to 8 in sequence on both units. If the lights blink in order on both sides, congratulations! You have a perfect, working cable. If lights are out of order, dim, or don’t light up at all, it indicates a problem such as a mis-wired pin, a short, or a bad connection that needs to be fixed by cutting off the connector and starting over.
Pro Tips and Common Mistakes to Avoid
Crimping becomes second nature with practice, but beginners can easily fall into a few traps. Here’s how to work like a pro from the start.
The Beginner’s Best Friend: Pass-Through Connectors
If you are new to crimping, we highly recommend using pass-through RJ45 connectors. Unlike traditional connectors where the wires stop at the end, pass-through connectors allow the eight wires to slide all the way through and out the front. This design offers two huge advantages:
- Easy Verification: You can visually confirm the wire order is 100% correct before you crimp.
- Better Connection: By pulling the wires taut, the twists can be maintained closer to the pins, improving signal integrity.
You will need a crimping tool specifically designed for pass-through connectors, as it has a blade that trims the excess wires flush with the connector’s face during the crimping action.
Common Pitfalls and How to Dodge Them
- Incorrect Wire Order: The number one mistake. Always double-check the T568B sequence before trimming and again before crimping.
- Jacket Not Secured: If the outer jacket isn’t pushed far enough into the connector, the strain relief clamp won’t grab it. This leads to a weak connection that can easily fail if the cable is pulled.
- Nicked Inner Wires: Being too aggressive with the stripper can damage the insulation on the inner wires, leading to shorts and unreliable performance. Be gentle.
- Wires Not Fully Seated: Ensure all eight wires touch the end of the connector. If even one is short, it won’t make contact with the pin when crimped.
- Using Cat5e Plugs on Cat6 Cable: Cat6 wires are thicker. Forcing them into a smaller Cat5e plug will be difficult and result in a connection that fails performance tests. Always match your components.
Frequently Asked Questions (FAQ) about Crimping Cat6
What is the maximum length for a Cat6 cable?
For network speeds up to 1000 Mbps (1 Gbps), the maximum length of a Cat6 cable is 100 meters (328 feet). For 10 Gbps speeds, the maximum effective length is reduced to 55 meters (180 feet).
Can I use a Cat6 cable for my home internet?
Absolutely. Cat6 is an excellent choice for modern home networks. It provides more than enough bandwidth for streaming, gaming, and general internet use, and it future-proofs your network for faster speeds to come.
What happens if I mix up the T568A and T568B standards?
If you wire one end as T568A and the other as T568B, you create a crossover cable. While most modern devices can auto-detect and use this, it’s not what you intended. If you wire both ends differently but not in a valid A-to-B configuration (e.g., a random order), the cable will simply not work at all.
Is it worth it to crimp my own cables?
If you only need one or two standard-length cables, buying pre-made patch cords is easier. However, if you need custom lengths for a clean installation, want to run cable through walls, or have multiple cables to make, crimping your own is far more cost-effective and a very useful skill to learn.