

Welcome to the D-Lay Cable official blog. With over 15 years as a leading manufacturer of high-performance network cabling solutions, we don’t just sell products—we provide expertise. Whether you’re a professional installer running hundreds of drops or a DIY enthusiast setting up a home network, mastering the art of crimping your own Ethernet cables gives you ultimate control over length and quality. dlaycable will walk you through the exact process our technicians use, ensuring a perfect, reliable connection every time.
Article Directory
- Why Crimp Your Own Ethernet Cable?
- Why Quality Components Matter: The D-Lay Cable Advantage
- Step 1: Gather Your Tools and Materials
- Step 2: Understand the Wiring Standards (T568A vs. T568B)
- Step 3: The Crimping Process (A Step-by-Step Guide)
- Step 4: Test Your Cable for a Perfect Connection
- Your Partner in Connectivity
Why Crimp Your Own Ethernet Cable?
While pre-made patch cords are convenient, custom-crimping cables offers significant advantages:
- Custom Lengths: Eliminate excess cable slack for a cleaner, more organized, and professional-looking installation. No more coiling up 5 extra feet of cable behind a desk.
- Cost-Effectiveness: For larger projects, buying bulk cable and connectors is significantly cheaper than buying individual pre-made cables.
- Repairs: A damaged connector doesn’t mean the entire cable run is useless. You can simply cut off the old connector and crimp a new one in minutes.
- Bulk Installations: Pulling bulk cable through walls and conduits is much easier without bulky connectors on the ends.
Why Quality Components Matter: The D-Lay Cable Advantage
As a direct manufacturer, we know that the reliability of your network depends on the quality of every single component. A poor connection can lead to slow speeds, data loss, and frustrating troubleshooting. Here’s why choosing premium materials is non-negotiable:
- The Cable: Our Cat5e bulk cable features pure copper conductors, not copper-clad aluminum (CCA). This ensures superior signal integrity, lower resistance, and better performance, especially for Power over Ethernet (PoE) applications. All our cables are UL, ETL, CE, and RoHS certified.
- The Connectors: A high-quality RJ45 connector, like those we produce, has sharp, precisely aligned pins with thick gold plating. This ensures a solid, corrosion-resistant connection that penetrates the wire insulation effectively for long-term reliability.
Using quality components from a trusted source like D-Lay Cable means you’re building a network foundation that won’t let you down.
Step 1: Gather Your Tools and Materials
Before you start, gather the essential tools. Having the right equipment makes the job faster, easier, and more reliable.
- Bulk Ethernet Cable: We’re using Cat5e for this guide, but the process is identical for Cat6.
- RJ45 Connectors: Ensure they are compatible with your cable type (Cat5e/Cat6).
- Crimping Tool: This is a specialized tool that presses the connector’s pins into the wires and secures the cable.
- Cable Stripper/Cutter: Most crimping tools have these built-in, but a dedicated tool can offer more precision.
- Ethernet Cable Tester: This is a crucial tool to verify your connections are correct before you deploy the cable.
Pro Tip: D-Lay Cable offers a full range of tools and accessories, all factory-tested for performance.
Step 2: Understand the Wiring Standards (T568A vs. T568B)
There are two standard wiring schemes for Ethernet cables: T568A and T568B. Functionally, neither is better than the other, but T568B is the most common and widely used standard in modern networks.
For a standard “straight-through” cable (used to connect a computer to a switch, router, or wall plate), you must use the same standard on both ends.
Here are the color codes, looking at the RJ45 connector with the tab facing down and the copper pins facing up:
- T568B (Recommended):
- Orange-White
- Orange
- Green-White
- Blue
- Blue-White
- Green
- Brown-White
- Brown
- T568A:
- Green-White
- Green
- Orange-White
- Blue
- Blue-White
- Orange
- Brown-White
- Brown
Our recommendation: Use the T568B standard unless you have a specific reason to use T568A (like matching existing wiring in a facility).
Step 3: The Crimping Process (A Step-by-Step Guide)
With your tools and knowledge of the wiring standard, you’re ready to create your cable. We’ll use the T568B standard.
3.1: Prepare the Cable
Using your cable stripper, carefully score and remove about 1 inch (2.5 cm) of the outer PVC jacket from the end of the cable. Be careful not to nick the inner wires. Once the jacket is removed, you will see four twisted pairs of wires. Some cables may also have a plastic spine or a nylon string (rip cord); you can trim these flush with the jacket.
3.2: Arrange the Wires
Untwist the pairs and separate all eight wires. Begin to flatten and straighten them. This is a critical step for getting them into the connector correctly. Arrange them in the T568B order from left to right: Orange-White, Orange, Green-White, Blue, Blue-White, Green, Brown-White, Brown. Keep them flat and parallel between your thumb and forefinger.
3.3: Trim and Insert the Wires
Hold the aligned wires tightly together. Use the cutter on your crimping tool to make a clean, straight cut, leaving about 1/2 inch (1.25 cm) of wire exposed from the jacket. The shorter the untwisted wire, the better the signal quality.
Now, carefully slide the wires into the RJ45 connector, keeping the flat orientation. The Orange-White wire should be on the left (Pin 1) when the connector’s tab is facing down. Push firmly but gently until all wires reach the very end of the connector. You should be able to see the copper ends of the wires through the transparent nose of the connector. Also, ensure the cable’s outer jacket is pushed inside the connector by at least 1/4 inch; this is what the crimper will secure for strain relief.
Double-check the wire order one last time!
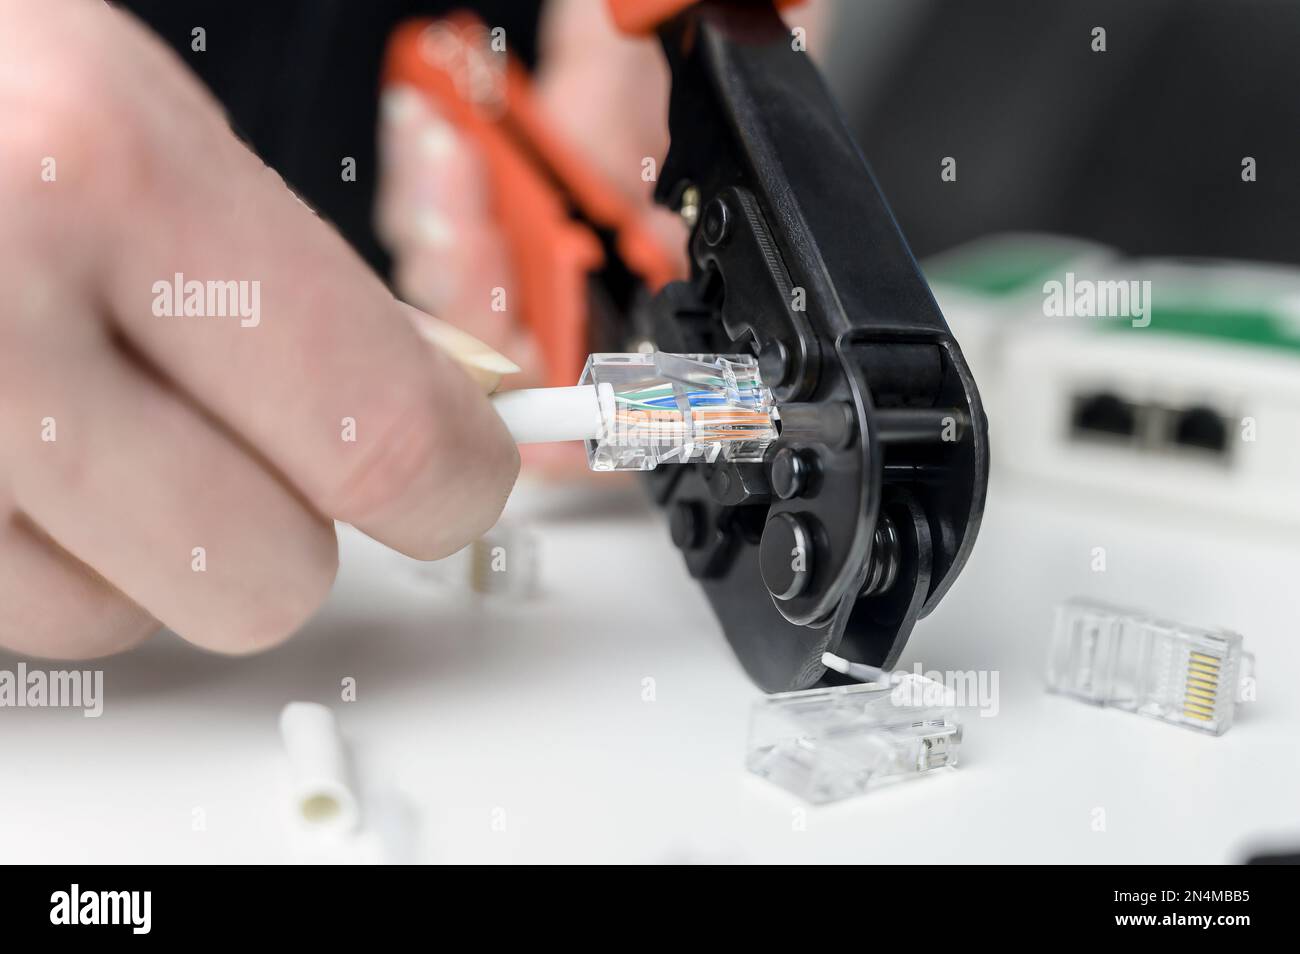
3.4: Crimp the Connector
Insert the RJ45 connector into the corresponding slot on your crimping tool. Squeeze the handles of the crimper firmly and evenly. You should hear and feel a “click.” This action does two things simultaneously:
- It pushes the gold pins down, piercing the insulation and making contact with the copper wire.
- It clamps the plastic strain-relief latch onto the cable’s jacket, securing it in place.
Once crimped, remove the cable. Give it a gentle tug to ensure the connector is secure. Now, repeat this entire process for the other end of the cable, using the same T568B standard.
Step 4: Test Your Cable for a Perfect Connection
Never assume a cable works. At D-Lay Cable, every custom assembly undergoes rigorous Fluke testing for quality assurance. You should do the same. Plug both ends of your newly created cable into an Ethernet cable tester. A good tester will check each of the 8 pins for continuity. It will show you a sequence of lights (typically 1 through 8) on both the main and remote units. If the lights flash in order on both sides, congratulations! You have a perfect straight-through cable.
If any lights are out of order, dim, or don’t light up, you have a fault. The most common cause is an incorrect wire order. Cut the connector off and try again, paying close attention to your color code.
Your Partner in Connectivity
You have now successfully crimped your own Cat5e Ethernet cable. By following these steps and using high-quality components, you’ve created a reliable, high-performance link for your network that is built to last.
At D-Lay Cable, we are more than just a supplier; we are your partner in building robust and efficient networks. From our OEM/ODM custom solutions to our vast in-stock inventory of cables, connectors, and tools, we provide the foundation for your connectivity needs. Explore our full range of products on www.dlaycable.com or contact our expert team for your next project.